Deauthentication attack and other exploits using an ESP8266!

🐦 Twitter
| 📺 YouTube
| 🌍 spacehuhn.de
Support me and my projects by purchasing one of the official deauther boards.
Or become my patron on patreon.com/spacehuhn.
- Introduction
- Disclaimer
- Supported Devices
- Installation
- How to use it
- FAQ
- License
- Sources and additional links
This software allows you to perform a deauth attack with an ESP8266 against selected networks.
The ESP8266 is a cheap and easy to use Wi-Fi SoC (System-on-a-Chip), programmable with the Arduino IDE.
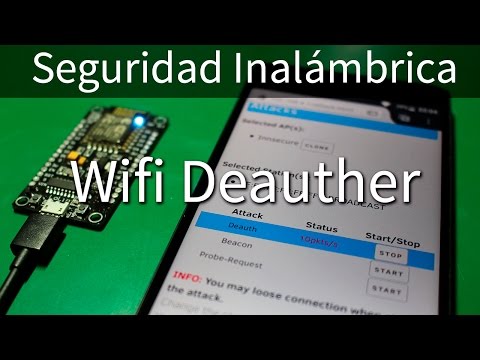
With this software flashed onto it, you can select a target network and start different attacks.
The deauth attack will, if the connection is vulnerable, disconnect the devices from the network. Because the attack is running constantly, the devices will be disconnected again and again. Depending on the network, that can either block a connection or slow it down.
The difference between deauthing and jamming: WiFi Jammers vs Deauthers | What's The Difference?
Other attacks also have been implemented, such as beacon and probe request flooding.
The deauth attack works by exploiting an old and known vulnerability in the 802.11 Wi-Fi protocol.
Because these deauthentication frames, usually used to close a Wi-Fi connection safely, are unencrypted, it's very easy to spoof them. You only need the mac address of the access point, which you can sniff easily.
If you don't want to attack all connected devices, you can also scan for connections and attack them specifically.
Is deauthing legal? WiFi Jammers/Deauthers | Legal?
With 802.11w-2009 the Wi-Fi protocol became encrypted management (and deauthentication) frames. This makes spoofing these packets way harder and the attack, in this form, ineffective. So make sure your router is up to date and has management frame protection enabled. Your client device (e.g your phone, notebook etc.) needs to support that too. Both ends of the connection need to use it!
The problem with that is, most routers use unencrypted managment frames by default, don't provide any option to change that and don't provide any information about this issue.
I tested several networks and couldn't find one that wasn't vulnerable!
I made a Deauth Detector using the same ESP8266 to indicate high amounts of deauth frames. It can't protect you, but it can help you figure out if and when an attack is going on.
This project is a proof of concept for testing and educational purposes.
Neither the ESP8266, nor its SDK was meant or build for such purposes.
Bugs can occur!
Use it only against your own networks and devices!
I don't take any responsibility for what you do with this program.
Please check the legal regulations in your country before using it.
It is not a frequency jammer as claimed falsely by many people. Its attack, how it works and how to protect against it is described above. It uses valid Wi-Fi frames described in the official 802.11 standard and doesn't block or disrupt any frequencies.
My intention with this project is to draw more attention on this issue.
This attack shows how vulnerable the 802.11 Wi-Fi standard is and that it has to be fixed.
A solution is already there, why don't we use it?
Please don't refer to this project as "jammer", that totally undermines the real purpose of this project!
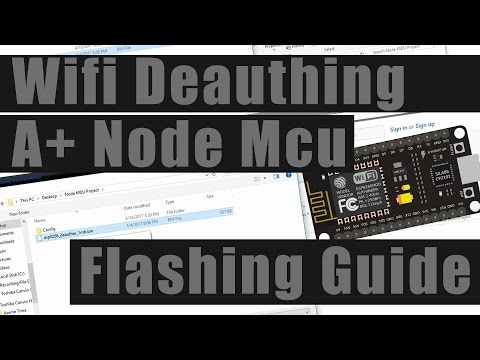
You can flash this software yourself onto any ESP8266, but if you would like to support me, you can get one of these cool boards that are made especially for this project and come with everything preinstalled!
- WiFi Deauther v1.5
- WiFi Deauther OLED v1.5
- WiFi Deauther OLED v2
You have 2 choices here. Uploading the .bin files is easier, but not as good for debugging.
YOU ONLY NEED TO DO ONE OF THE INSTALLATION METHODS!
0 Download the current release from releases
Always use the 1mb version, unless you're sure that your ESP8266 only has 512kb flash memory.
Note: the 512kb version won't have the full mac vendors list.
1 Upload using the ESP8266 flash tool of your choice:
- nodemcu-flasher [Windows only]
- esptool-gui [Windows, MacOS]
- esptool [Windows, MacOS, Linux]
That's all!
Make sure your settings are correct for your board. Most boards come with 4mb flash and sometimes you have to hold the flash button down while plugging it in and hold it until the flashing process started.
Also make sure you select the right com-port, the right upload size (mostly 4mb) and the correct .bin file.
If it's not working, you can try using the Arduino as descriped below.
0 Download the source code of this project.
1 Install Arduino and open it.
2 Go to File > Preferences
3 Add http://arduino.esp8266.com/stable/package_esp8266com_index.json to the Additional Boards Manager URLs. (source: https://github.com/esp8266/Arduino)
4 Go to Tools > Board > Boards Manager
5 Type in esp8266
6 Select version 2.0.0 and click on Install (must be version 2.0.0!)

7 Go to File > Preferences
8 Open the folder path under More preferences can be edited directly in the file

9 Go to packages > esp8266 > hardware > esp8266 > 2.0.0 > tools > sdk > include
10 Open user_interface.h with a text editor
11 Scroll down and before #endif add following lines:
typedef void (*freedom_outside_cb_t)(uint8 status);
int wifi_register_send_pkt_freedom_cb(freedom_outside_cb_t cb);
void wifi_unregister_send_pkt_freedom_cb(void);
int wifi_send_pkt_freedom(uint8 *buf, int len, bool sys_seq);

don't forget to save!
12 Go to the SDK_fix folder of this project
13 Copy ESP8266Wi-Fi.cpp and ESP8266Wi-Fi.h
14 Paste these files here packages > esp8266 > hardware > esp8266 > 2.0.0 > libraries > ESP8266WiFi > src
15 Open esp8266_deauther > esp8266_deauther.ino in Arduino
16 Select your ESP8266 board at Tools > Board and the right port at Tools > Port
If no port shows up you may have to reinstall the drivers.
17 Depending on your board you may have to adjust the Tools > Board > Flash Frequency and the Tools > Board > Flash Size. I use a 160MHz flash frequency and a 4M (3M SPIFFS) flash size.
18 Upload!
Note: If you use a 512kb version of the ESP8266, you will need to comment out a part of the mac vendor list in data.h. Otherwise it will use too much memory to fit on 512kb.
Your ESP8266 Deauther is now ready!

I included 2 extra .bin files for the display version on the release page.
One for the 0.96" SSD1306 OLED and one for the 1.3" SH1106 OLED.
| Display | ESP8266 |
|---|---|
| SDA | 5 |
| SCL | 4 |
| GND | GND |
| VCC | VCC (3.3V) |
The buttons have to be between following pins and GND:
| Button | ESP8266 |
|---|---|
| up | 12 (D6) |
| down | 13 (D7) |
| select | 14 (D5) |
If you use Arduino, you have will need to install this library: https://github.com/squix78/esp8266-oled-ssd1306.
Then you only need to uncomment //#define USE_DISPLAY in the beginning of the sketch.
Below that, you can customize the settings:
  //create display(Adr, SDA-pin, SCL-pin)
  SSD1306 display(0x3c, 5, 4); //GPIO 5 = D1, GPIO 4 = D2
  //SH1106 display(0x3c, 5, 4);

  //button pins
  #define upBtn 12 //GPIO 12 = D6
  #define downBtn 13 //GPIO 13 = D7
  #define selectBtn 14 //GPIO 14 = D5
  #define displayBtn 0 //GPIO 0 = FLASH BUTTON
First start your ESP8266 by plugging it in and giving it power.
Scan for Wi-Fi networks and connect to pwned. The password is deauther.
Once connected, you can open up your browser and go to 192.168.4.1.
You can now scan for networks...

scan for client devices...

Note: While scanning the ESP8266 will shut down its access point, so you may have to go to your settings and reconnect to the Wi-Fi network manually!
...and start different attacks.

For more information please read the FAQ.
This software is licensed under the MIT License. See the license file for details.

Wi-PWN - By @samdenty99
 Modern and Consistent - By @Wandmalfarbe

DeAutherDroid Android APP - By @ExploiTR


deauth attack: https://en.wikipedia.org/wiki/Wi-Fi_deauthentication_attack
deauth frame: https://mrncciew.com/2014/10/11/802-11-mgmt-deauth-disassociation-frames/
ESP8266:
packet injection with ESP8266:
- http://hackaday.com/2016/01/14/inject-packets-with-an-esp8266/
- http://bbs.espressif.com/viewtopic.php?f=7&t=1357
- https://github.com/pulkin/esp8266-injection-example
802.11w-2009: https://en.wikipedia.org/wiki/IEEE_802.11w-2009
Wi-Fi_send_pkt_freedom function limitations: https://esp32.com/viewtopic.php?t=586